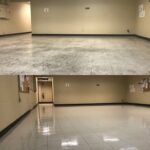
Stripping and waxing your VCT floor:
The process of stripping and waxing involves eliminating previous wax and dirt layers to give the floors a like-new appearance while shielding them from further harm.
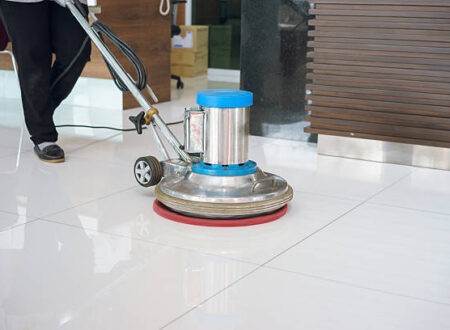
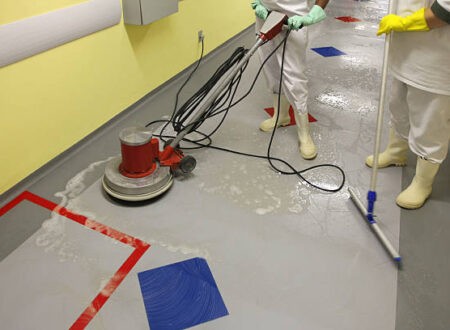
Vinyl floors require regular maintenance to maintain their resilience and shine, even though they can last a very long time. Vinyl floors become dull and prone to scratches, abrasions, wax buildup, yellow discoloration, and dirt attraction when improper care is neglected. The Floor Cleaning Experts can restore the appearance of your floor by stripping, sealing, and waxing it. We can offer routine maintenance, such as high-speed buffing and sporadic scrubbing and re-coating, to keep your floors looking brand new.Cleaning and polishing your VCT flooring
What is Stripping and Waxing?
The process of stripping and waxing involves eliminating previous wax and dirt layers to give the floors a like-new appearance while shielding them from further harm.
The process of removing old wax and dirt layers from floors, giving them a like-new appearance, and sealing them against future damage is known as stripping and refinishing.
When to Strip a Floor and Apply Wax
All VCT tile floors will eventually show signs of wear, including dulling and discoloration from foot traffic. The length of time the floor lasts will depend on how much traffic it sees and how much daily maintenance it gets. Eventually, even the best-maintained floor finish will need to be completely replaced to preserve the tile and give the greatest possible presentation. Planning is your most valuable tool when it comes to completing a full “strip and wax” project. With a strip and wax, all
traces of floor finish, dirt, and stain are eliminated from the tile, leaving it perfectly bare after cleaning with chemicals and scrubbing.
How to Strip and Wax a Floor
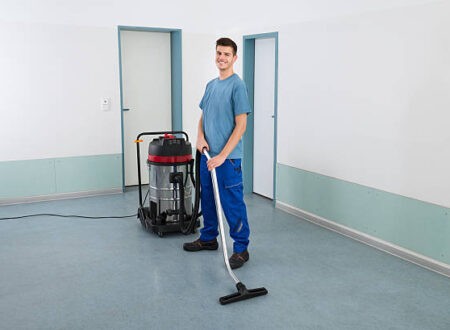
Getting Ready to Strip
Any cleaning process should start with the right instruments, janitorial supplies, commercial cleaning supplies, and personal protective equipment (PPE).Cleaning and polishing your VCT flooring
Stripping and waxing your VCT floor
1: Clear the Area of Any Objects or Floor Mats
Sweeping and clearing the area of any large debris is a good way to start cleaning.
In the area that is going to be refinished, make sure to vacuum and roll up any floor mats.
2: Prevent Stripping Solution from Entering Adjacent Areas
Clear the area of any large debris to start the cleaning process.
A sealed-back carpet mat should be placed outside the area that needs cleaning.
By gathering extra liquid or dirt from visitors’ shoes, the mat lowers the possibility that it will be tracked out of the room and into other parts of your establishment.3: Make the Stripping Solution Correctly
Certain stripping solutions must be appropriately diluted because they are not ready-to-use (RTU).
Always follow the manufacturer’s instructions when preparing the stripper solution. Effective dilution is essential to the product’s functionality. A chemical that is overly concentrated won’t always function more quickly or effectively. May not work with concentrated solutions.
For instructions, see the label on the product.
4: Permit the Flooring Removal Solution to Incubate
The term “dwell time” refers to how long a product must stay wet on the surface in order to function at its best.
Stripping solution usually requires a 5–10 minute dwell time, though manufacturer recommendations may differ.
To find the suggested dwell times, check the product label.
Caution: Take care to prevent the stripping solution from drying on the flooring. If areas start to dry out before the suggested dwell time, add more solution to those areas.

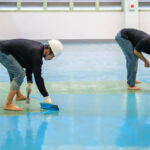
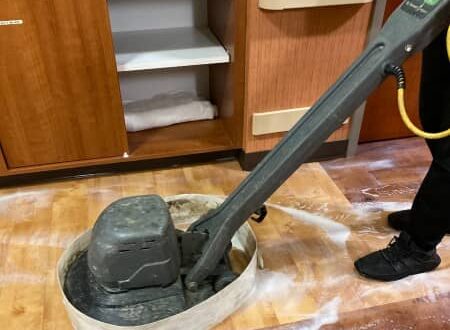
5: Agitate the Floor: Clean and polish your vinyl plank flooring.
Use an auto scrubber or low-speed floor machine with a black pad to stir the floor stripper after letting the stripping solution sit for a while.
This will be the most effective device if you have an auto scrubber available. Don’t fill the auto scrubber with detergent. The floor will only be agitated and rinsed with it.
Expert Advice: Not every floor pad can effectively remove floor finish. If you want help selecting the best floor pad for your requirements, speak with a Floor Care Expert.
6: Solution Removal Test Floor
When the floor beneath the stripping solution no longer feels sticky after agitating, it is ready to be removed. Run your hand over the floor while wearing a glove to test the surface.7: Take Out the Floor Stripping Agent
7: Remove Floor Stripping Solution
If you plan to remove floor stripping solution with an auto scrubber, make sure the following settings are set:
Scrubbing pad and brushes Squeegee down Vacuum On
Step 8: Wipe the floor
Before applying finish, rinse the floor with fresh, cold water to get rid of any leftovers.
If you’re cleaning, damp mop using a figure-8 pattern.
Make sure the following settings are in place before using an auto scrubber to rinse the floor:
Swap out the floor pad or scrub brush for a clean one.
Scrubbing pad and brushes Squeegee down Vacuum on
9: Tidy Baseboards
The baseboard may get splashed with the stripping solution during the process.
Rinse off any solution to prevent leaving splash marks and more persistent stains. Using your clean mop to liberally apply clean water is the most efficient way to accomplish this.
10: Waxing your VCT floor and removing all residue
See if there is any more residue on the floor. Using a glove, run your hand over the floor. Nothing should be removed from the floor.
Rinse the floor once more if anything is left behind.
11: Apply Several Finish Coats
Usually, floors need three to four coats of floor finish. Your floor type, the type of floor finish, and the condition of the floor will ultimately determine how many coats you need.
Wait until your floor has dried for the minimum amount of time advised before applying more coats.
Advantages of Floor Stripping and Waxing:
There are various advantages to a strip and wax, even though it takes longer and costs more than regular cleanings. Among the most significant are:
- preventing damage to your floor.
- revitalizing the way your floor looks.
- making future floor cleaning tasks simpler.
- maintaining more hygienic floors.
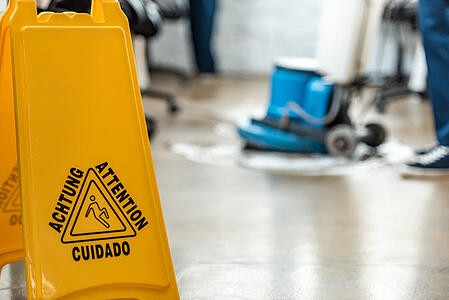
- lowering the possibility of trips and falls.
Avoid these mistakes when stripping and waxing
We advise you to study the top 5 floor stripping errors before starting.
- The chosen floor stripper is incompatible with the floor.
- incorrect dilution of floor strippers
- Insufficient Dwell Time
- Before the floor stripper is removed, the floor dries.
- After Rinsing, the Floor Stripper Stays on the Floor
Stripping and waxing your VCT floor-corporate clean LLC
Waxing and stripping your floor is an excellent method of shielding it from deterioration. It can aid in protecting the underlying surface in addition to improving the floor’s appearance. Nonetheless, routine maintenance is necessary to keep the floor coating looking its best. This means keeping it free of dirt and debris and repairing any possible scratches or chips. With the help of a professional floor coating service, your floor coating will look amazing for many years to come.
You can restore your floors to their best appearance with the help of professional floor stripping and waxing services.Make sure you get in touch with us right now if you’re interested in having your floors coated.